

Post by Ancient Goddess on Dec 16, 2005 19:55:44 GMT -5
Second Photoshop tutorial...I made this design a looooong time ago, the result is in an old thread in this section somewhere, but I figured I'd write another tutorial for people who'd want backgrounds for their sigs without brushes. This one requires no fractural, abstract, grunge brushes, etc. to do. The end result looks like this:

Step #1
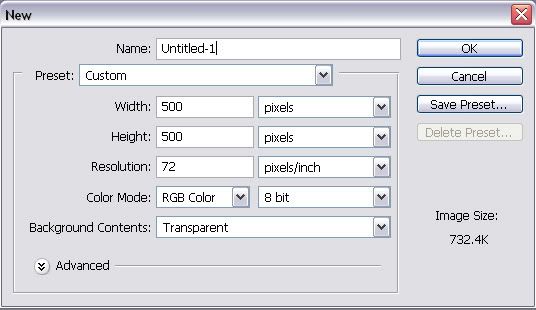
The first step is to open a new document at the dimensions 500x500. You can increase the size later, but for now, we're going to make it at a smaller scale.
Step #2
Next, pick two colors. They should be different from each other (like white and a dark red, or whatever...just as long as they don't blend together well). For this tutorial, I'm going to be using black and a light blue. Make sure the darker color is the background color and the lighter color is in the forground position.
Then on the top menu, choose Filter<Render<Clouds. You should get something like this:

Step #3
Okay...next go to the top menu again and chose Filter<Pixelate<Mezzotint and make sure the setting is at "Short lines". Then click OK.

Step #4
Then return to the top menu and chose Filter<Blur<Radial Blur. Make sure the window is at these settings before you click OK:
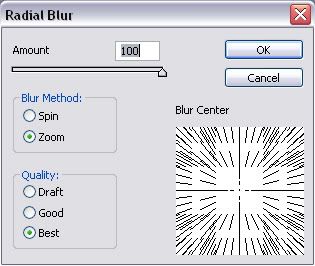
Hit Ctrl+F to make it smoother. So now, your image should look something like:

Step #5
Now we're going to make the twirl. Return to the top menu and go to Filter<Distort<Twirl. Make the setting at 100 and click OK.

Duplicate the layer (right click on the layer in the lower-right hand corner and choose duplicate) and go into the Twirl menu again, but this time set it on -200.
Step #6
Go into Blending Properties on the topmost layer (right click the layer in the window) and choose "Lighten". Your background should now be finished!
Hmm...I thought there'd be more than 6 steps...but hey, it worked well in that number.
Enjoy!
--Ancient Goddess
